|
|
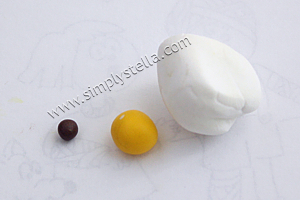
| What we'll need: * Polymer clay in these colours: brown, yellow, white, red and dark green * An old mascara brush * A toothbrush * Light and dark yellow chalk (or pencils); brown chalk (optional) * Red and white oil paint * Fimo Liquid and/or TLS * Table salt * Sandpaper * Yellow and brown acrylic paints * Old make up sponge * A thin brush * Oregano * Water or alcohol based varnish |
 |
|||
 |
 |
|||
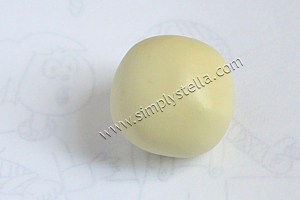
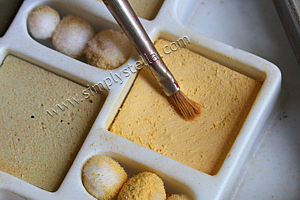
| Mix a small amount of brown and yellow clay with a lot of white - see picture for proportions- to get a light
beige color. Form the clay into a ball. |
||||
 |
 |
 |
||
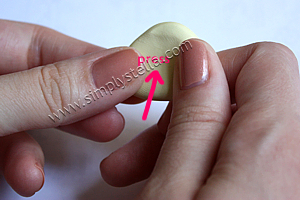
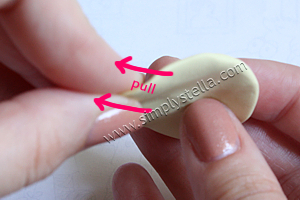
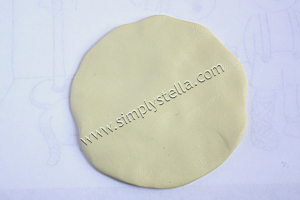
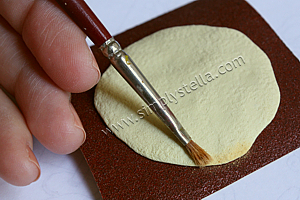
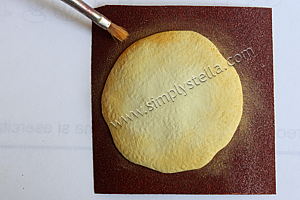
| Flatten the ball with your fingers. Start by pressing the clay in the middle; when it's flat enough start pulling
the edges with the tips of your fingers, with an "inside-out" motion. You'll end up with a thin (about 1-2 mm) clay circle. It doesn't have to be perfectly rounded, though! Uneven edges make the pizza look more realistic :) |
||||
 |
 |
|||
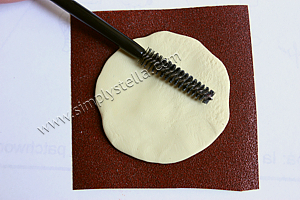
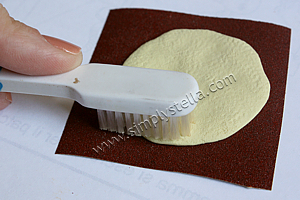
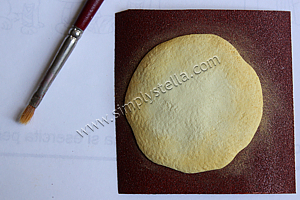
| If you want to texture the back of the pizza, lay the clay on a piece of sandpaper. Texture the front by rolling a mascara brush all over the clay; once you're done, tap a toothbrush on the borders of the pizza base. |
||||
 |
 |
 |
||
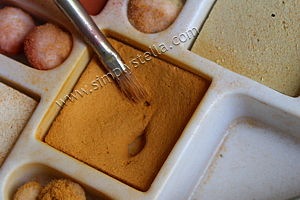
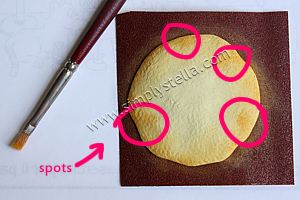
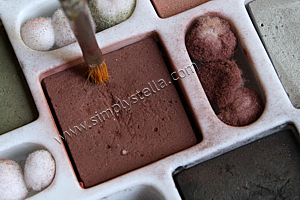
| Pick up some light yellow chalk with a brush, and apply it to the pizza base, especially on the borders. | ||||
 |
 |
 |
||
| Add some spots of dark yellow to the borders of the pizza base. | ||||
 |
 |
 |
||
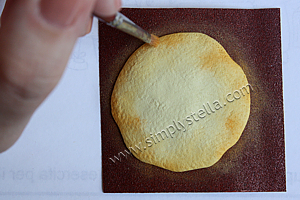
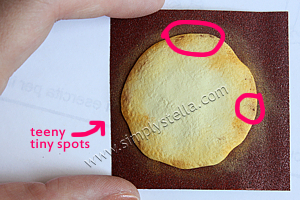
| Optional: you can give the pizza a "burnt" look by adding tiny spots of brown chalk here and there.
Use a hard bristles brush and tap it vertically on the clay.
Your mini-pizza's base is ready to be baked! Bake it in the oven for about 5 minutes, then let it cool off. |
||||